Sectioning The Hair: 3 Methods
20/10/2021 2024-07-08 18:39Sectioning The Hair: 3 Methods

Sectioning the hair is one of the most important parts of hairstyling techniques, especially when detaching a haircut. It helps create a visual idea of what the hairstyle may look like on the person. It also helps in creating consistent balance throughout the style. It is similar to copy pasting commands in a computer, that is adjusting the final results of the style with the help of sectioning.
Sectioning is the key to achieving the most glamorous styles regardless of whether it’s a haircut, hair color, hair straightening or curling. But each of these styles have their own requirements and needs. This is where the sectioning of the hair is made into 3 methods:
Sectioning The Hair For Haircutting
When it comes to hair cutting, the sectioning of the hair is to be done in such a way that the final result is well balanced and flawless. In order to do so, the hair needs to be sectioned in the following way:
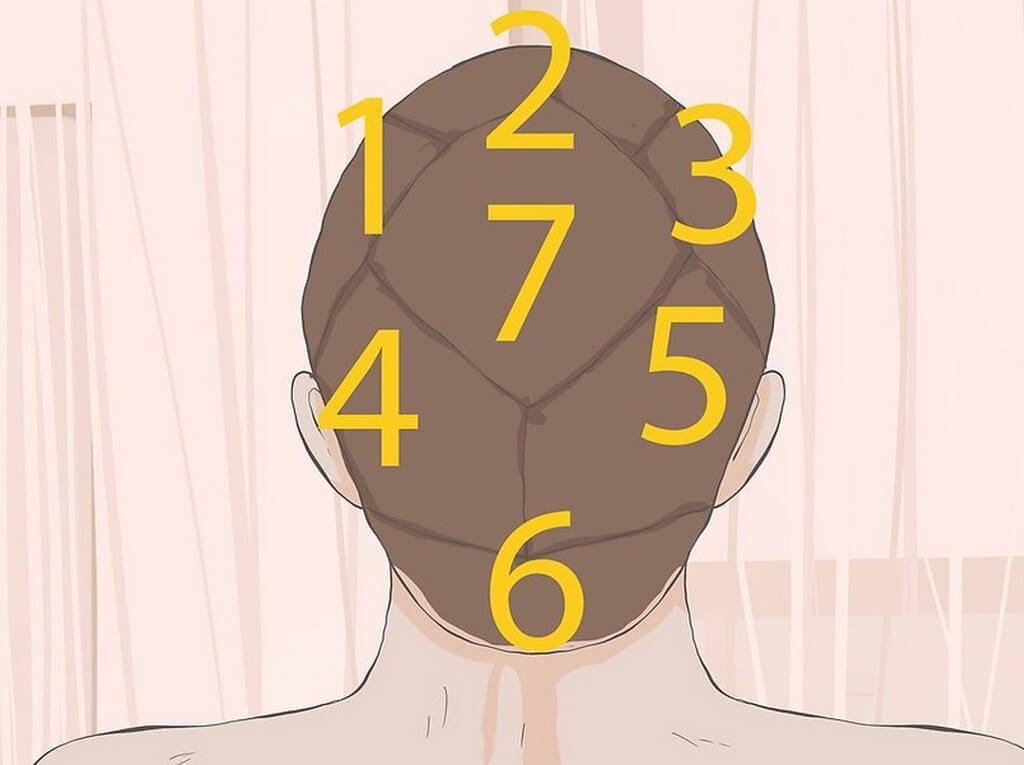
The control while cutting the hair will be well versed if parted into 7 sections – top side, right side, left side, right crown, left crown, right nape, and left nape.
Step 1: Sectioning the front –
To section the front of the hair, using a comb, pick and part the hair above the one ear from one side to the other side in the same position above the other ear. Separate the front portion from the rest of the hair, comb the sectioned hair frontward.
Step 2: Separate the hair on top of the head –
Isolate the top third of the hair that was sectioned and combed forward in the previous step. With the help of a butterfly clip, twist and tighten the sectioned hair on top of the head.
Step 3: The right and left side of the hair –
Similar to the previous step, using the butterfly clip intact the right and left side of the sectioned hair respectively.
Step 4: Partitioning the hair in the back of the head –
To create a clean and balanced partitioning of the back hair, start from the mid ear portion of the hair and run it across to the same position behind the other ear and section it. The top portion of the sectioned hair will be used for the crown area of the scalp.
Step 5: Dividing the right and left crown of the hair –
The top position of the hair that was partitioned in the previous step is to be divided in the middle into the right crown and left crown. These two sectioned hair can also be tightened using a butterfly clip.
Step 6: Creating the nape sectioned hair –
Once the right and left crown have been sectioned, gather the remaining hair air at the bottom, that is towards the nape section, and repeat the same process as done for the sectioning of the crown and with the help of a butterfly clip to hold the sectioned hair in place.
Sectioning Of The Hair For Hair Rollers
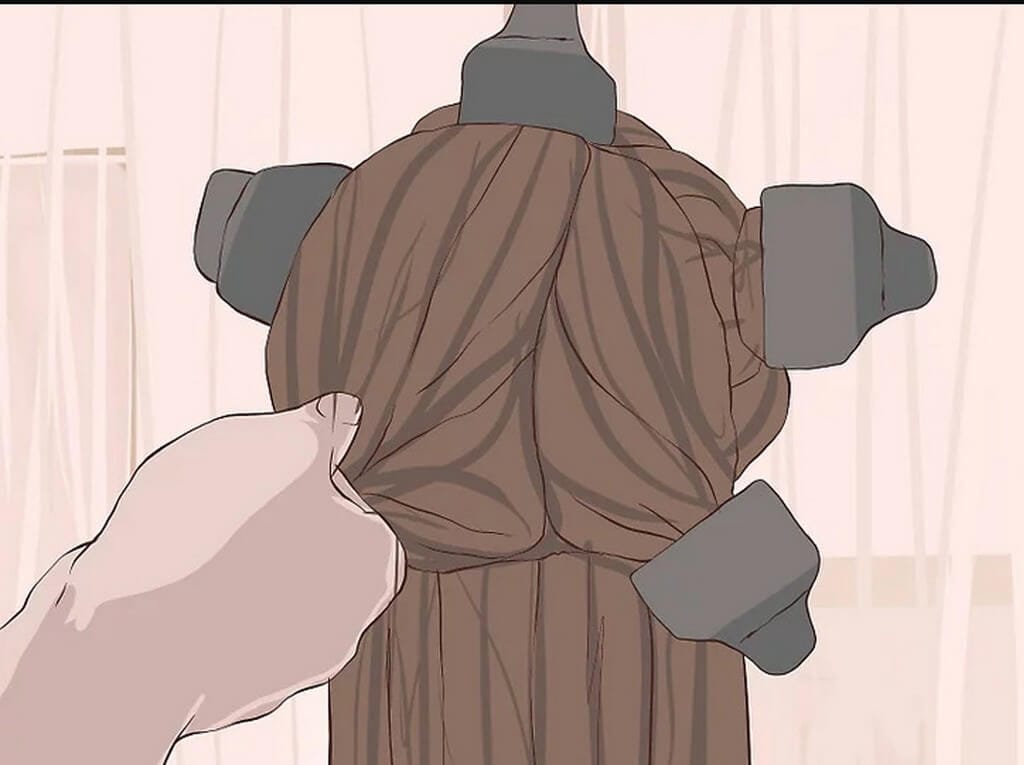
As mentioned earlier, every hairstyle requires a particular sectioning to balance out the style. In case of using a hair roller, the hair needs to be sectioned into three parts – top of the head, crown and nape. These sections will further be divided and rolled into place in the following steps:
Step 1: Sectioning into three parts –
With the help of the comb or pick section the hair into three parts – top of the head can be sectioned from the top part of one ear to another and the second section can be made by sectioning from the mid of one ear to the other and the remaining hair at the bottom will be considered as the naope section. These sectioned hair will not only make the process of rolling your hair easy, but also ensure that the curls will fall into place in the best position.
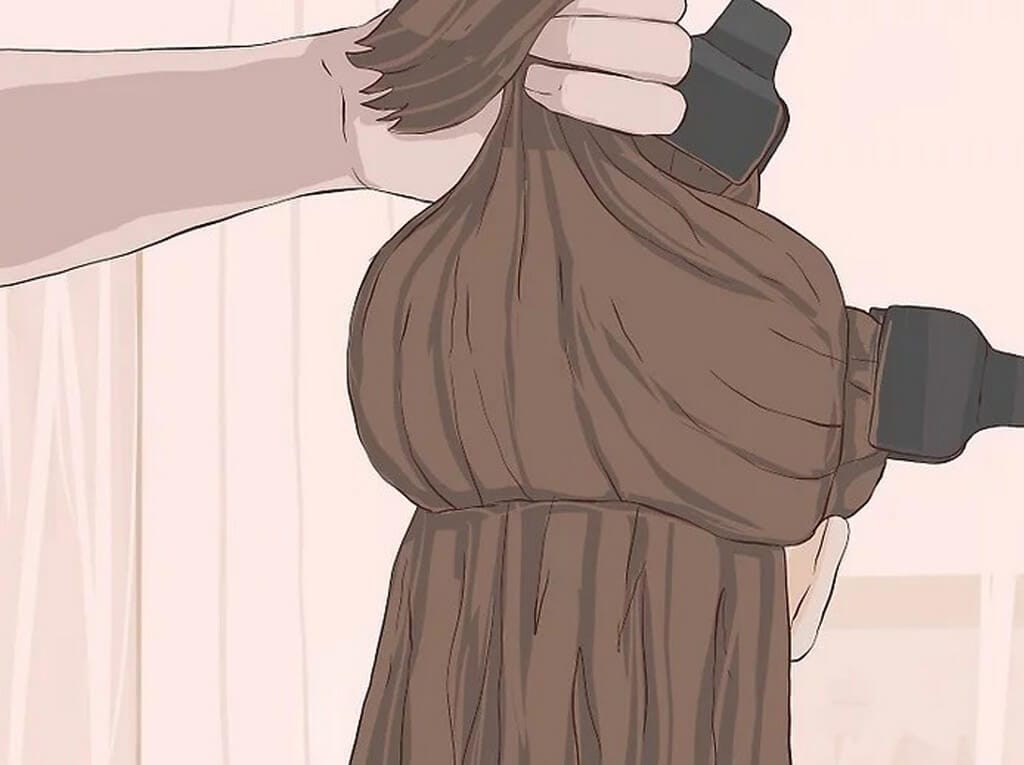
Step 2: Further sectioning the sectioned hair –
The already sectioned hair is to be further separated from the center section of hair. With the help of a comb or pick, create a 2 inches wide strip in the middle of your hair, including the hair from the forehead, and the hair from the forehead uptil the back of your head, that is, the nape of your neck and secure it with a butterfly clip.
Step 3: Sectioning the remaining hair –
Tie the remaining hair into two ponies, left and right. These sectioned hair can be either secured with a butterfly clip or a rubber band.
Step 4: Sectioning to the size of the hair roller –
When the sectioned hair is rolled into place, the hair is to be pulled away from the scalp. The roller is to be laced and rolled inwards, towards the scalp. Once the hair has been rolled firmly, it is to be secured with hair pins, tightly.
The 4th step is to be followed for sections of the hair, including the hair in the nape of the neck. Once the hair has been rolled into place, it is to be left on for about 2 to 3 hours, or overnight with a shower or bed cap on (this will help avoid any abrasions and frizziness).
Sectioning For Hair Straightening
When it comes to hair straightening, similar to that of the hair rolling, it is to be divided into 3 sections. The only difference is the position and placement of the sectioning. By dividing the hair into 3 layers or sections, it is easier to attain the best results. Although, the 3 layer sectioning method does not work for all the hair types. If the individual has a thicker hair, then it can be divided into four or six layers as per the desired end result.
Step 1: Sectioning into 3 layers –
Divide and secure the hair with a butterfly clip into 3 layers – top crown portion, the left and right hair.
Step 2: Defining the sectioned hair portions –
To further define and straighten the hair on the top, place the thumbs behind the ears and pull the hair up, sliding them across the back of the head until they meet in the middle. Clip the hair by twisting the sectioned portion to create the top layer.
Step 3: Sectioning the sides of the hair –
Repeat the previous steps to section and secure the left and right side of the remaining hair on the top.
Step 4: Straightening the hair –
The bottom of the hair can be left loose, adn start straightening from there. To achieve the best results, take small locks of hair and straighten it over twice, for best results. Once the bottom action has been completely straightened, declip the other section of the hair and straighten it the same way, that is by taking a lock of hair and straightening it until the desired straightness is achieved.
Sectioning the hair can be done in various ways, as per the comfort of the stylist and the style chosen to implement. JD Institute, is one of the best design colleges in Karnataka that also offers a diploma course in hairstyle artistry. They have courses on weekdays and weekends, as per the comfort of the trainee. The trainers at JD Institute are highly qualified in their respective field of work and have great mentoring experiences.


